Wednesday 9 June 2010

Intro To Digital - InDesign Final Piece

This is my final piece for the InDesign brief which stated that the piece must contain an example of a Photoshop manipulated image as well as a vector image done in Illustrator. (Click to enlarge):

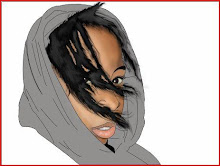
I feel that this was not one of my best pieces of work but I was very pressed for time and had to complete the work as soon as I could. I am most pleased with the magazine pencil logo, the vector image done in Illustrator.

Tuesday 8 June 2010

Intro To Digital -Illustrator Final Piece

This is my final piece created in Illustrator. The brief stated that the word "vector" must be included in the design and that there was to be two fonts that we had created/designed. (Click to enlarge):Creating my own fonts was the hardest part of this design as i wanted it to be a bit different from other fonts found out there. So I would say that the font creation took the most time. The rest of this design was really simply done using the pen tool, gradients and plenty of colour.

Intro To Digital - Photoshop Final Piece

In the second term for the Intro to Digital module we had to create a piece of artwork using each programme: Adobe Photoshop, Adobe Illustrator and Adobe InDesign. The brief stated that we had to use scanned images as well as images that we took ourselves. This is my final piece created using Photoshop (click to enlarge):


The images of the camera and the girl are the ones that I took myself and the jewellery and the paparazzi images are scanned in. The most time consuming part of this project was using the pen tool to make selections and cut out the parts of the photo I wanted.

Our Pearly Suit:The Finished Pieces

We finished the suit in just two days flat which was quite surprising as there were only three of us (Sian, Graham and myself) working on the suit and we thought it would have taken us alot longer. Here is our very own finished Pearly Kings and Queens suit: hat, jacket and trousers.

Making Our Pearly Suit: Part 2

Just a few more images showing day two of making the suit. After finishing up making all 1000 badges needed we got to work on putting them onto the suit:

Making Our Pearly Suit: Part 1

So having now been given all the necessary materials to make the badges as well as the suit itself we were able to make a start on putting our suit into production. First of all we had to make the badges for our suit. Below are a couple of photos showing our circle cutter, badge maker, roll of cut out crisp packet circles to make the badges with, your truly doing a bit of work and what the finished badges looked like.

.